Handle your certificates
This guide shows you how to manage your certificates in Mitigater. Documentation is a good way to show your clients that you are handling risks. Keeping your certificates up to date ensures accurate risk mitigation data.
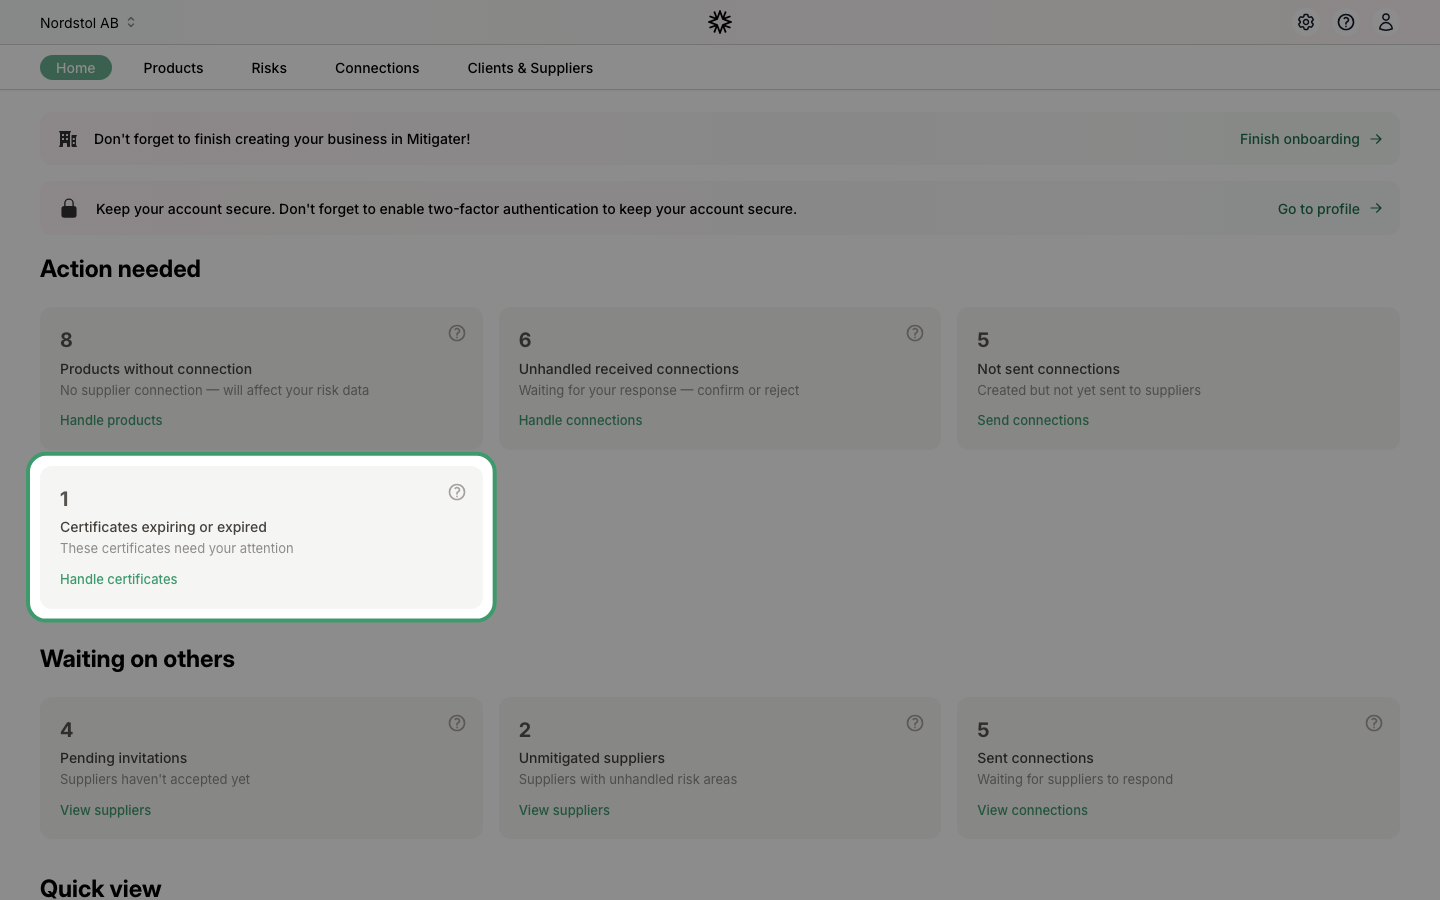
Certificate notifications
When a certificate expires or is about to expire, you will see a notification on your dashboard under Action needed. Click Handle certificates to go directly to the certificates page.
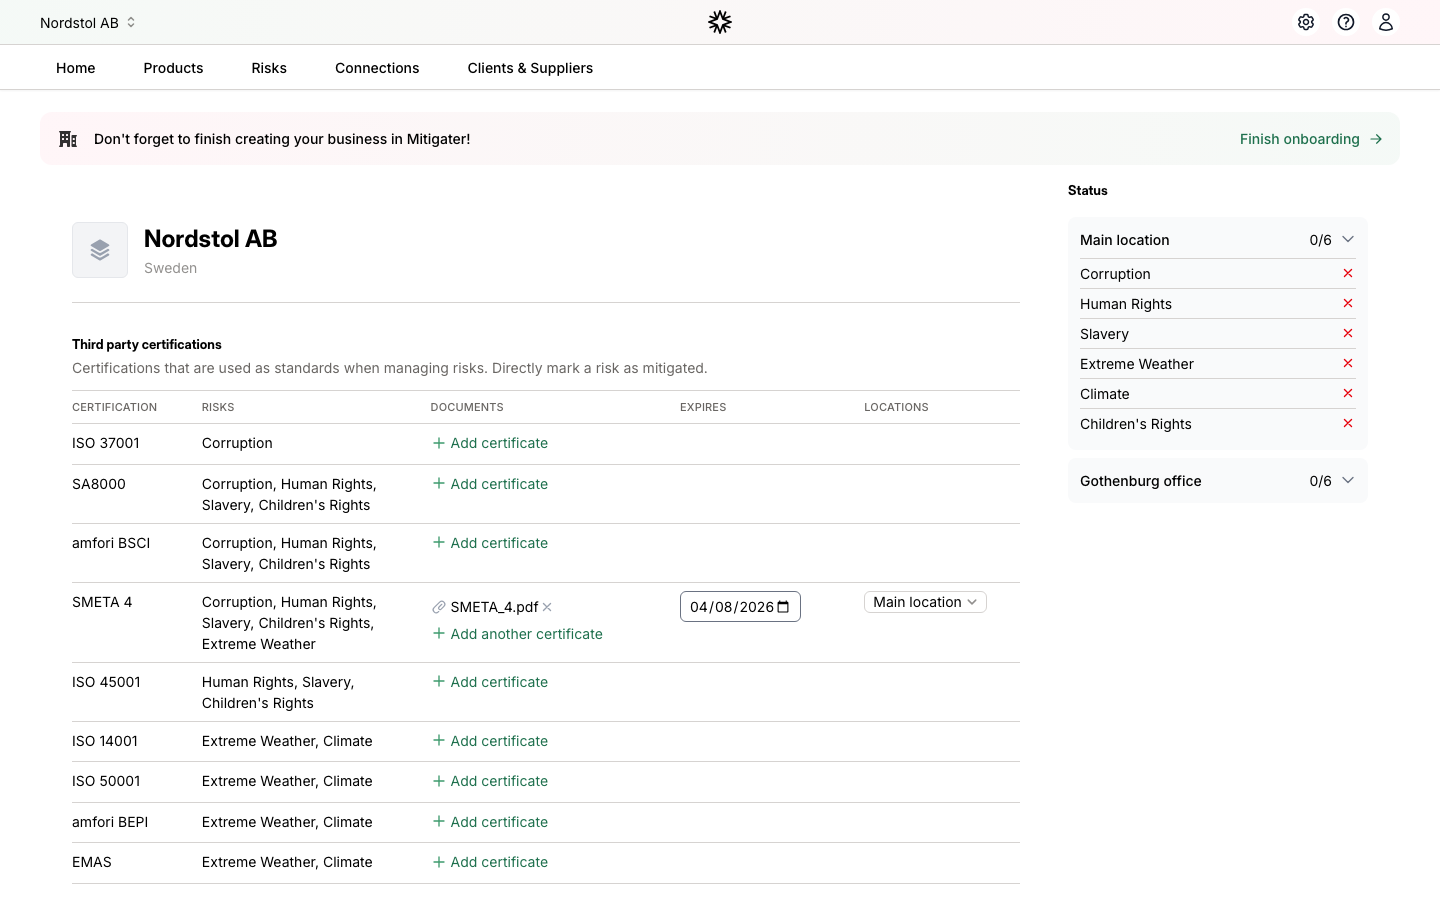
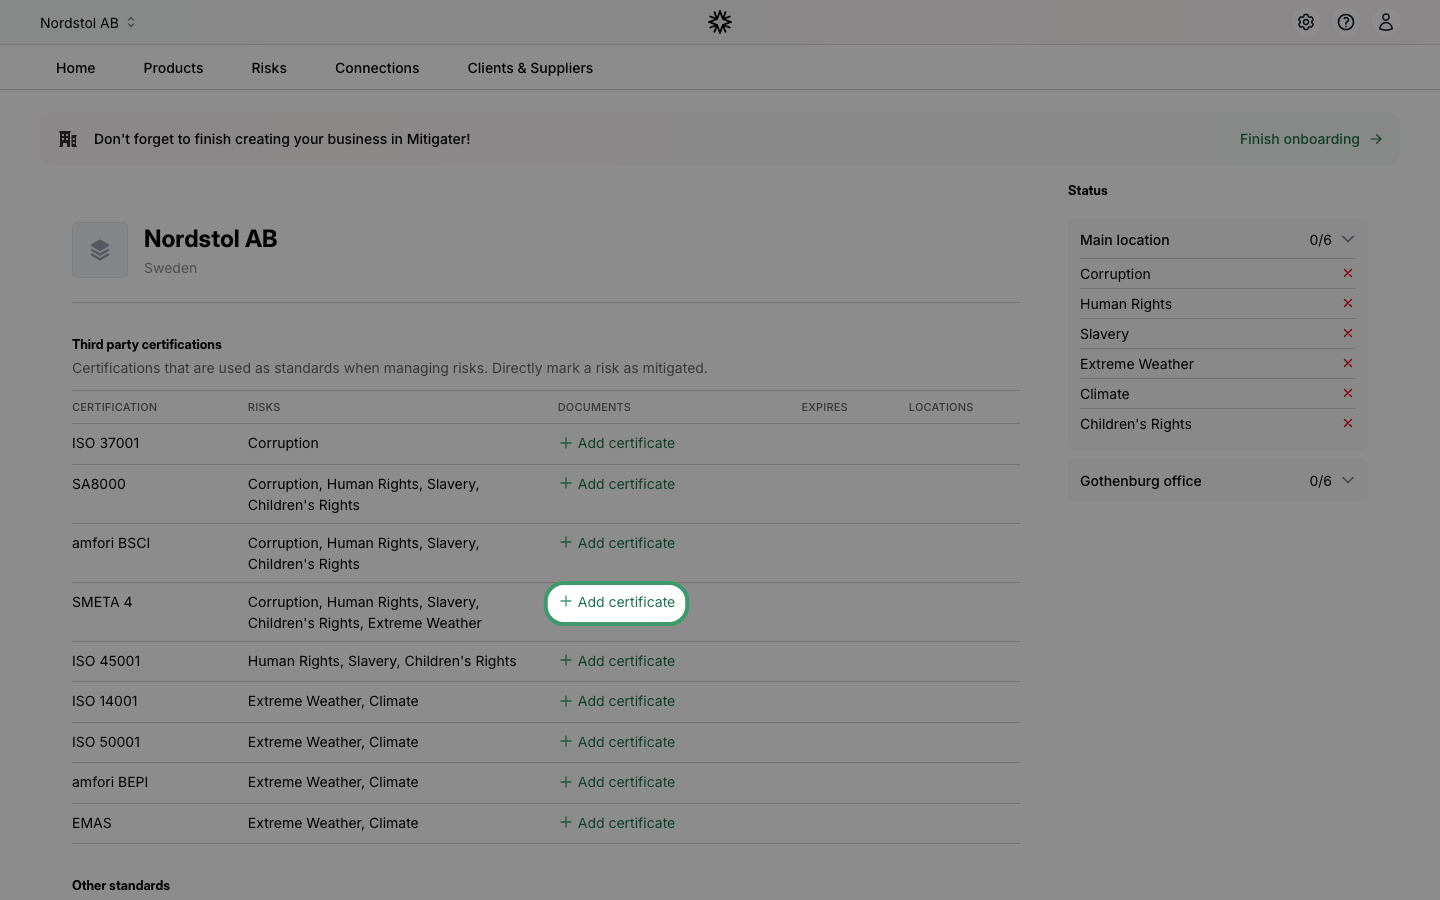
The certificates page
The certificates page shows all available certification types organized in three categories: Third party certifications, Other standards, and Non-standards. The sidebar on the right shows which risks are mitigated at each location.
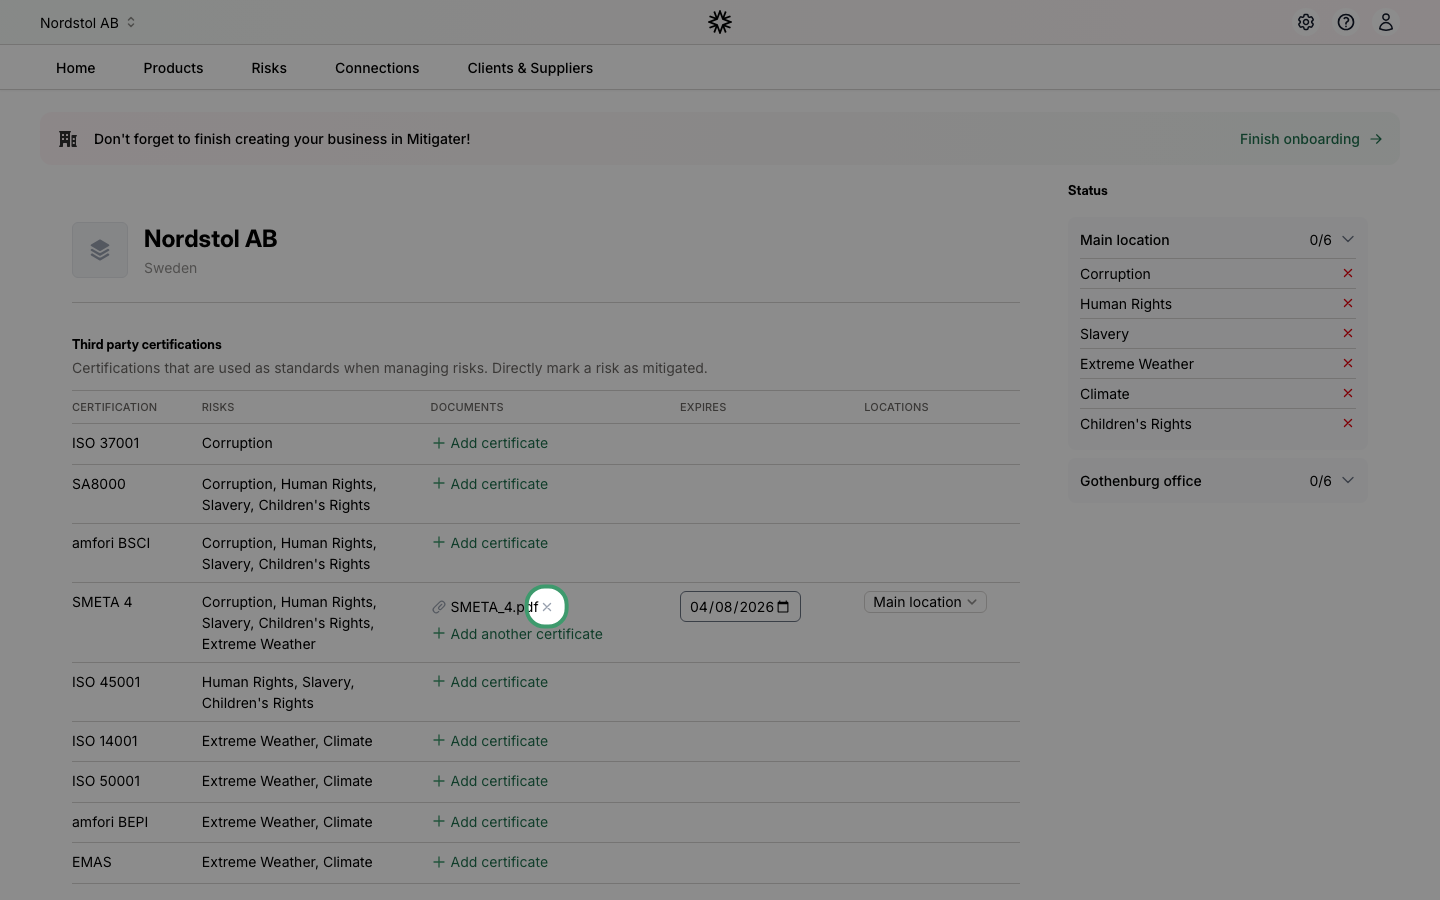
Remove an expired certificate
If a certificate has expired, you can remove it by clicking the X button next to the file name.
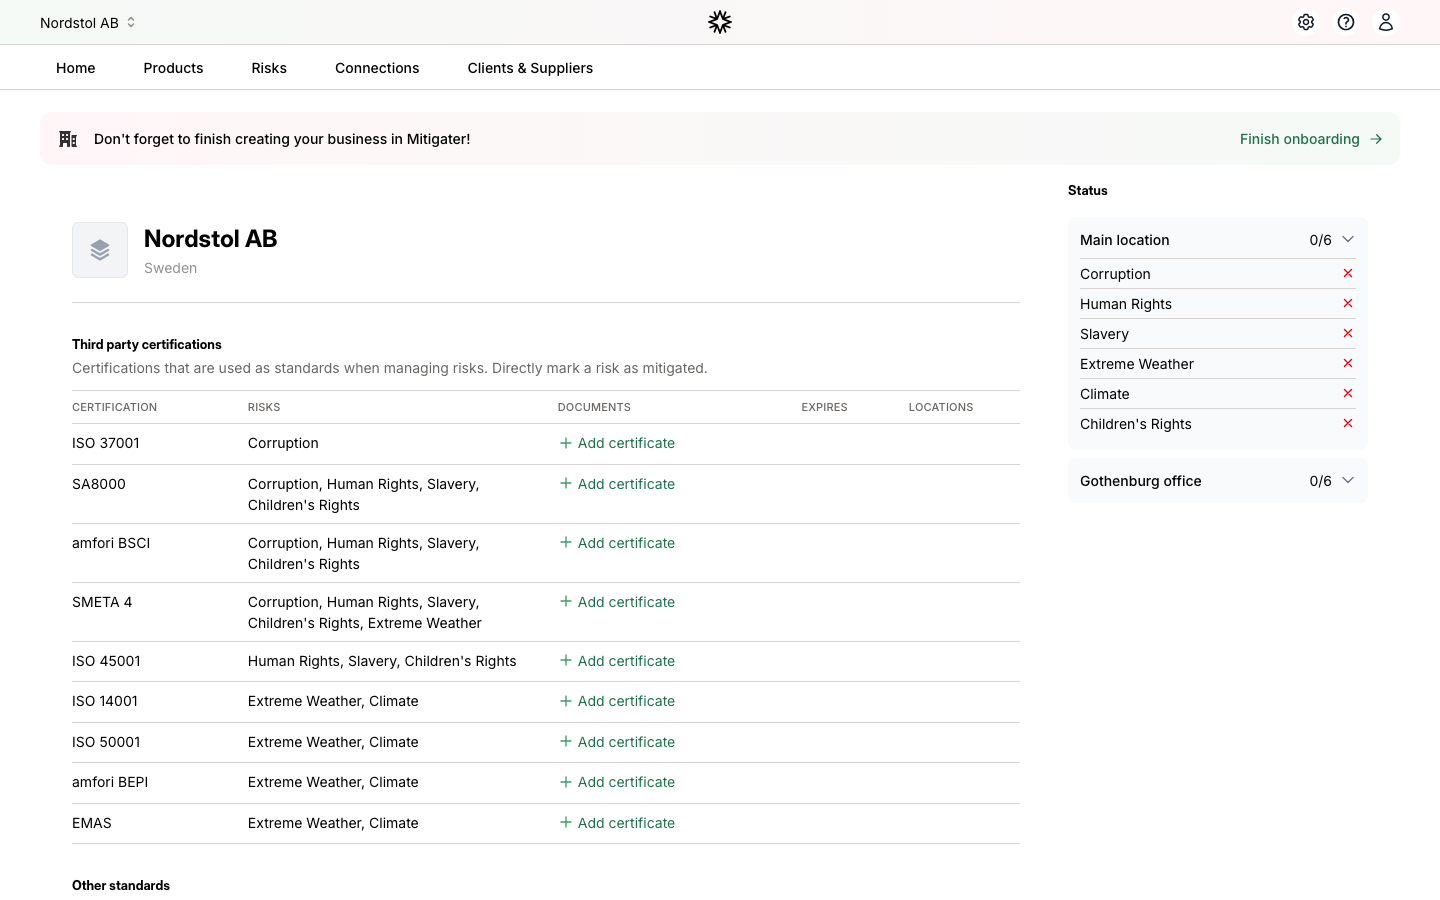
Certificate removed
After removing the expired certificate, the row now shows + Add certificate so you can upload a new one.
Add a new certificate
Click + Add certificate on the row of the certification type you want to add documentation for. Select a PDF, DOC, DOCX, or TXT file from your computer.
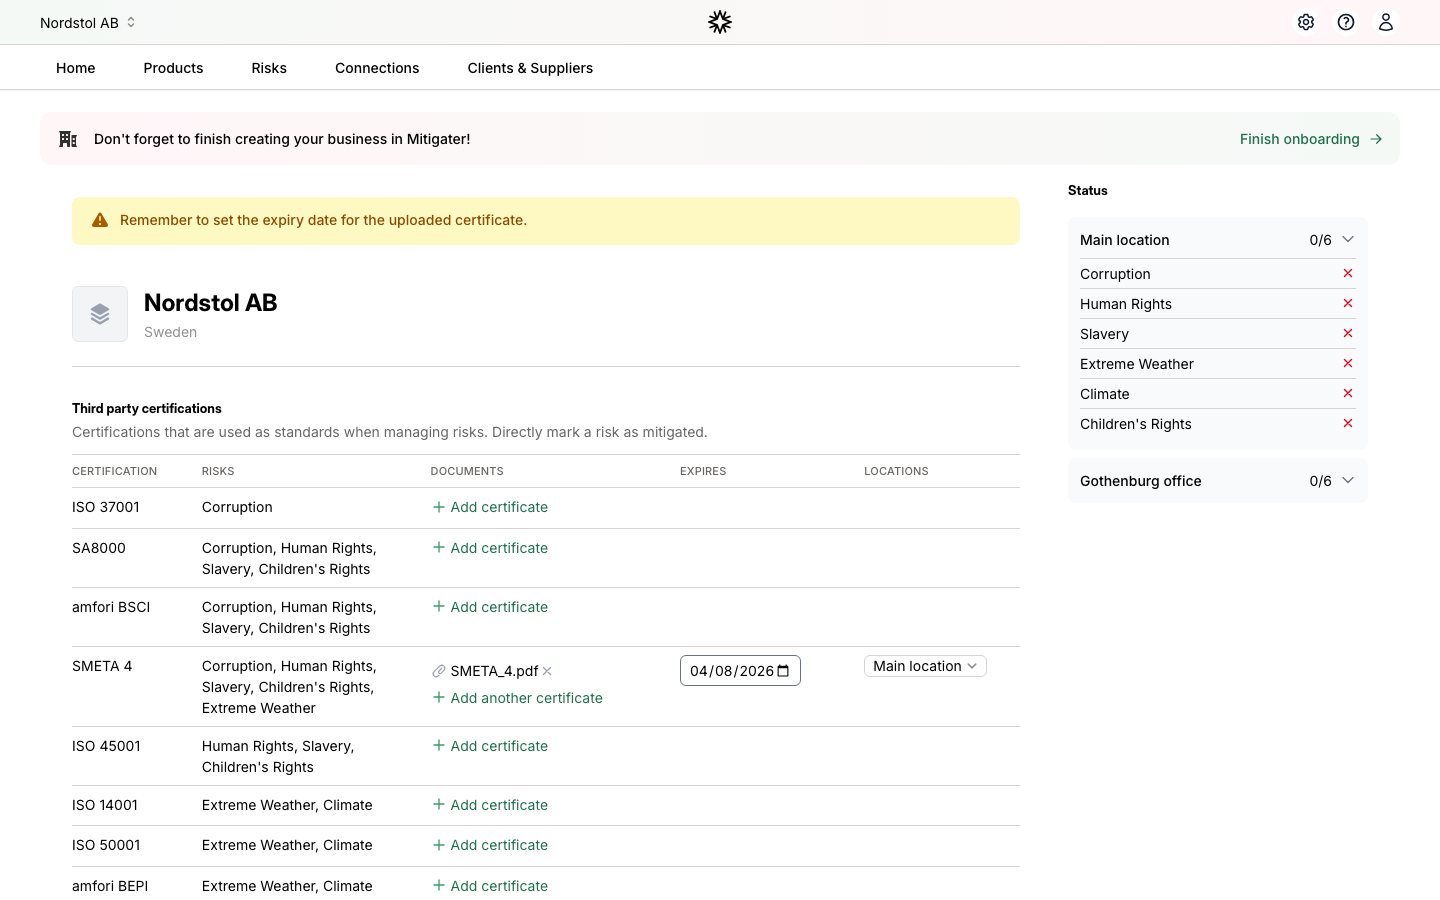
Certificate uploaded
After the upload completes, your file appears in the documents column. A yellow reminder will prompt you to set the expiry date.
Set the expiry date
Set the correct expiry date using the date picker — make sure it is in the future. Notice how the Status sidebar on the right immediately updates to show which risks are now mitigated by the certificate.
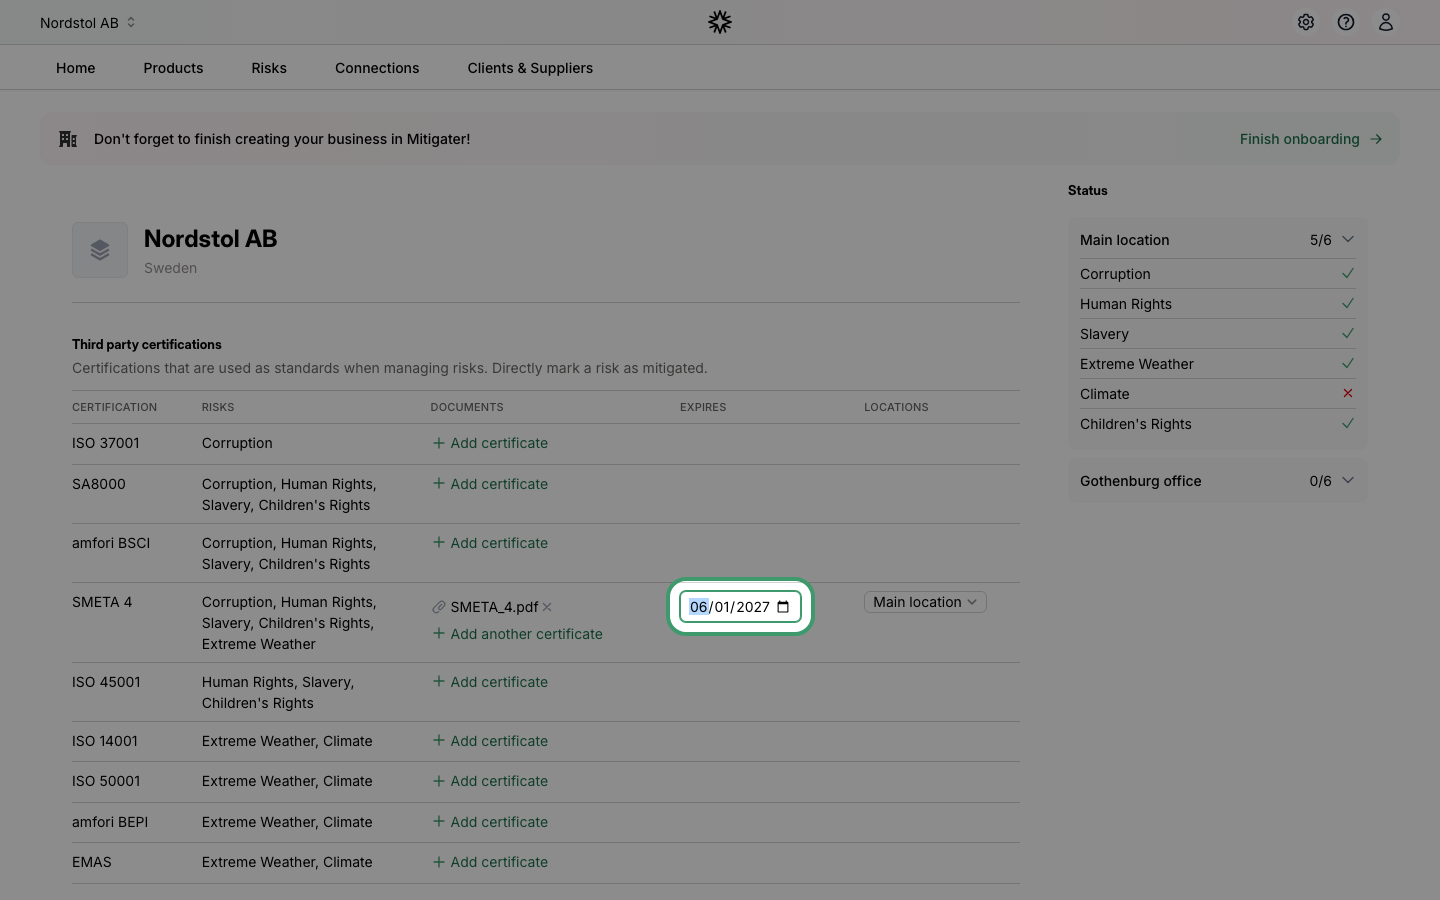
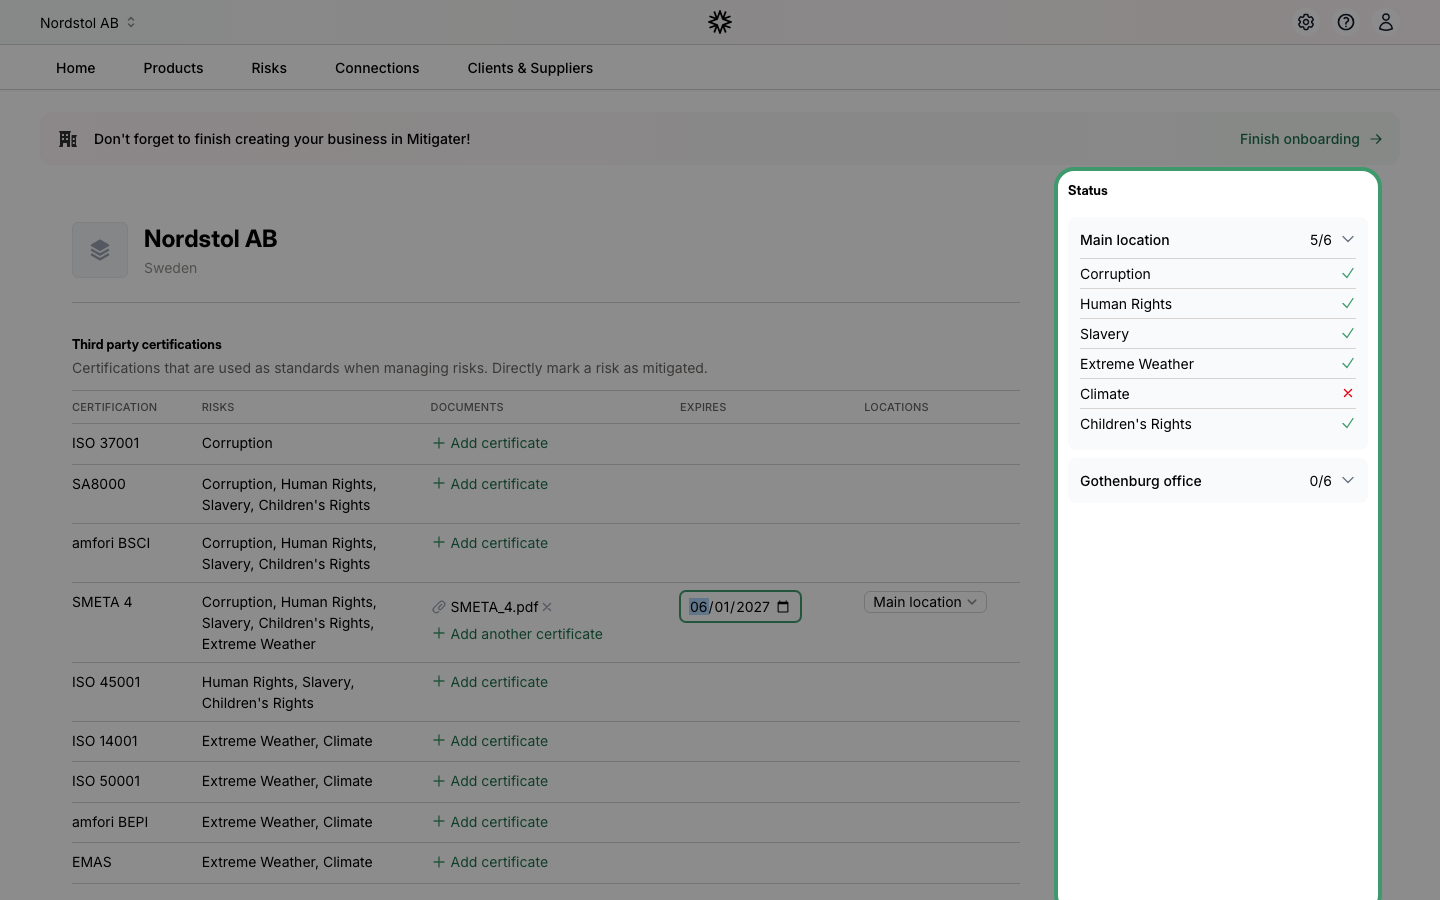
Risk mitigation status
The Status sidebar shows how many risks are mitigated at each location. A green checkmark means the risk is covered by a valid certificate, while a red cross means it is not yet handled. In this example, the SMETA 4 certificate now covers 5 out of 6 risks.
 Next step: Learn how to invite team members.